Tiny houses have exploded in popularity as a solution for affordable, sustainable living. But standard tiny home designs often overlook one crucial group: people with mobility challenges or disabilities. A handicap accessible tiny house combines the financial and environmental benefits of downsizing with thoughtful design that ensures independence and dignity for all residents. Whether you’re building for a family member, planning ahead for aging in place, or simply want universal design principles in your compact home, this guide walks you through real modifications that work in tight spaces without breaking the budget.
Table of Contents
ToggleKey Takeaways
- A handicap accessible tiny house requires strategic planning around hallway width (minimum 36 inches), doorway clearance (32 inches), and 5-foot turnaround spaces to ensure mobility independence in compact living.
- Critical bathroom modifications include installing ADA-compliant raised toilets (17–19 inches), grab bars bolted into studs, and curbless showers with proper waterproofing to enhance safety without expensive renovations.
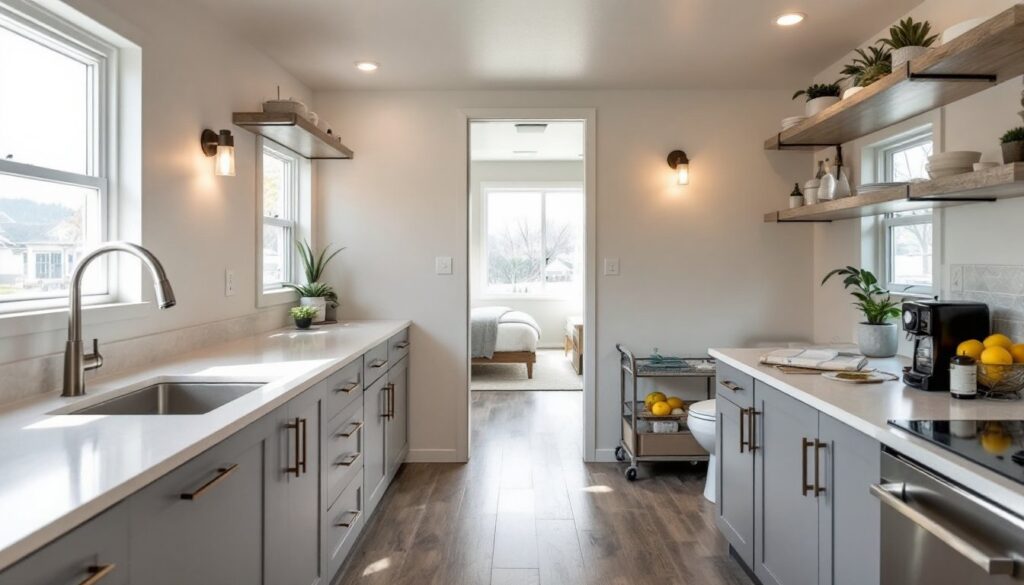
- Kitchen accessibility in a tiny home means lowering at least one counter section to 34 inches with open knee space and using pull-out drawers instead of deep cabinets to improve reach while seated.
- Smart storage solutions like open shelving, rolling carts, wall-mounted pegboards, and rail-mounted closet systems maximize vertical space while keeping frequently used items within the 15–48 inch reach zone.
- Standard accessibility upgrades such as grab bars ($20–$50 each), vinyl plank flooring ($2–$5/sq ft), and pocket door hardware kits ($150–$300) are budget-friendly and DIY-installable for handicap accessible tiny house projects.
- Universal design features that benefit wheelchair users, children, and aging residents prove that accessible design in a tiny home improves usability and independence for everyone.
Understanding Accessibility in Compact Living Spaces
Accessible design in a tiny house means creating an environment where people using wheelchairs, walkers, or other mobility aids can move freely and independently. Unlike large homes, tiny spaces demand smarter planning because every inch matters. The Americans with Disabilities Act (ADA) outlines standards for public buildings, but residential accessibility is less strictly regulated, which actually gives you flexibility to adapt standards to your unique situation.
Start by understanding the core principle: circulation. In a tiny home, hallways, doorways, and the path between living areas must accommodate someone in a wheelchair or using a mobility device. Standard doorways are typically 32 inches wide: accessible doorways need at least 32 inches clear opening width (using a standard door frame). Hallway width should measure at least 36 inches for single-direction traffic, or 42 inches if you want two people to pass comfortably. These aren’t just numbers, they’re the difference between independence and being stuck in a room.
Consider your specific situation early. Are you designing for someone with occasional mobility challenges or full-time wheelchair use? Does the resident have upper-body strength? Will they eventually live alone or with a caregiver? These questions shape every decision, from ramp angles to cabinet heights to bathroom layout. Many tiny home owners find that universal design, features usable by people of all ages and abilities, benefits everyone. A lower kitchen counter works better for someone in a wheelchair, sure, but it also helps shorter residents and kids.
Essential Layout and Floorplan Modifications
The floorplan is everything in a tiny accessible home. You’re not just fitting rooms into 200–400 square feet: you’re ensuring someone can safely navigate without dead ends, tight corners, or blocked routes. Start by mapping traffic patterns. The most essential flows are bedroom to bathroom, kitchen to living area, and entry to all major spaces. In many tiny homes, these overlap, and that’s okay, but you need clearance.
Doorways, Hallways, and Circulation Paths
Doors are often the first bottleneck. Standard interior doors swung 90 degrees inward or outward consume floor space. For an accessible tiny home, consider pocket doors or barn-style sliding doors, they slide into or along a wall and free up 2–3 feet of floor space. If you use swing doors, ensure the door swings away from the main living area (typically into hallways or bedrooms) and that there’s at least 18 inches of clear floor space beside the door on the pull side.
Hallway width is non-negotiable. A 36-inch hallway is the ADA minimum for single-direction traffic and allows a wheelchair to navigate. In a tiny home, this might mean sacrificing closet space or shrinking a bedroom slightly, a worthwhile trade-off for usability. Install grab bars along hallways if the resident will need them: these aren’t afterthoughts but integral to the design. Use the tiny home lifestyle framework to rethink what storage and layout really need to occupy wall space.
Turnaround spaces are crucial. Wheelchairs need a 5-foot diameter turning radius in key rooms, the bathroom, bedroom, and kitchen. In a 200-square-foot tiny home, this is tight, but one unobstructed circular area where someone can turn around fully prevents frustration and safety hazards. Plan this carefully during the design phase: it’s much harder to relocate walls after framing.
Bathroom and Kitchen Accessibility Upgrades
Bathrooms and kitchens are the hardest-working rooms in any home, and the most dangerous for someone with mobility challenges. In a tiny home, they’re also the smallest, so every modification counts.
For the bathroom, the toilet height is the first consideration. Standard toilets are 14–15 inches: ADA-compliant models sit 17–19 inches tall, making transfers from a wheelchair easier. Pair this with sturdy grab bars: one behind the toilet (horizontal, 33–36 inches above the floor) and one along the wall beside it (vertical or at an angle). Don’t use suction-cup bars or temporary fixtures, lag-bolt them into studs for safety. A curbless shower (also called a zero-threshold or walk-in shower) is the holy grail of accessible bathrooms. In a tiny home, you might install a compact 3×3-foot zero-threshold shower with a handheld showerhead and a fold-down bench seat. This requires careful waterproofing and sloped flooring (typically a 1:48 slope toward a linear drain), so consider hiring a professional for this work.
For sink and vanity height, position the sink at 34 inches above the finished floor and ensure at least 27 inches of knee clearance underneath, this means open space, no cabinet base. A wall-mounted sink or a pedestal sink works better than a vanity in this regard. Install the mirror with the bottom 40 inches above the floor so someone in a wheelchair can see themselves.
The kitchen is where many DIYers make compromises, and that’s okay. At least one section of counter should sit at 34 inches (4 inches lower than standard 38-inch counters), with open knee space underneath. Use pull-out drawers instead of deep cabinets: they’re easier to access while seated. Place frequently used items between 15 and 48 inches from the floor. Wall-mounted cabinets above the counter should have the bottom edge at 48 inches or lower. A single-bowl sink with minimal depth works better than a double-bowl for wheelchair access. Speaking of kitchens, check affordable home improvement resources for DIY-friendly counter and cabinet options that won’t drain your budget.
Smart Storage and Space-Saving Accessible Features
Storage in a tiny accessible home requires ruthless prioritization. You won’t have room for a pantry, a linen closet, and a coat closet. Instead, maximize vertical space and built-in solutions.
Open shelving (36–48 inches above the floor) stores everyday items within reach while keeping the wall open visually. Lazy susans in corner cabinets help someone reach items without stretching or twisting. Rolling carts with brakes fit under desks or beside beds for flexible storage. Wall-mounted pegboards or magnetic strips for kitchen tools keep items accessible without consuming counter space.
For clothing, a rail-mounted closet system (like those used in retail shops) lets someone see and grab clothes without digging. Hooks set at 36–48 inches above the floor work better than high rods for many people. Under-bed storage drawers on wheels hold seasonal items or linens. In the living area, a low, open shelf unit (12–18 inches from the floor) provides accessible storage without a bulky cabinet.
Lighting and controls often get overlooked. Install light switches and thermostats at 36–48 inches (reachable from a seated position), not the standard 48–52 inches. Motion-sensor lights in hallways and bathrooms improve safety. Consider smart-home controls, voice-activated lights or automated blinds, that reduce the need to reach switches. These upgrades aren’t luxury add-ons: they’re practical accessibility tools. The tiny home builder directory features professionals experienced in installing these systems efficiently.
Affordable Materials and DIY Installation Tips
Accessibility modifications don’t require fancy materials or an unlimited budget. Smart choices let you stay practical and cost-conscious.
Grab bars can run $50–$200 per bar if you buy designer finishes: standard brushed stainless steel or powder-coated steel bars cost $20–$50 each and work just as well. Buy them in bulk if you’re installing multiple bars. You’ll need a drill, a level, and a stud finder, basic tools. Fasten them directly into wall studs with lag bolts: never rely on drywall anchors alone.
For flooring, avoid plush carpet or thick rugs that impede wheelchair rolling. Polished concrete, vinyl plank flooring, or low-pile tile work best. Vinyl plank flooring (luxury vinyl plank or LVP) costs $2–$5 per square foot installed and is DIY-friendly with a straightforward click-lock system. Ensure transitions between room materials use low-profile trim (under 0.25 inches) to avoid tripping.
Doorways benefit from pocket door hardware kits ($150–$300 per door), which are easier to install than you’d think if you’re comfortable with basic carpentry. A pocket door kit comes with a track, rollers, and a frame: you’ll cut a rough opening in your stud wall and assemble according to instructions. If structural changes are needed, hire a contractor, load-bearing walls require proper support.
Bathroom grab bars and threshold removal are pure DIY territory. A curbless shower is trickier and often worth hiring for, especially the waterproofing and slope, mistakes here cause leak damage. For counters, laminate or solid-surface materials (like Corian) are cheaper than stone and easier to modify. Install one accessible section yourself using stock cabinets and a lowered counter top ($300–$600 for materials).
When buying materials, shop online and in-store. Specialty accessibility suppliers often cost more: big-box stores stock basic grab bars, threshold ramps, and hardware at competitive prices. Resources like small space living ideas and affordable tiny home designs show real examples of budget-conscious accessible homes.
Conclusion
Building or retrofitting a handicap accessible tiny house is absolutely achievable on a DIY budget if you plan carefully and prioritize smartly. Focus on circulation, doorway width, and essential bathroom modifications first. Don’t sacrifice usability for aesthetics or save money by skimping on grab bars. The result is a home where everyone, regardless of mobility, can live independently, safely, and affordably. Start with the floorplan, then tackle layout changes, bathrooms, and storage. Your future self will thank you.